Start to Finish
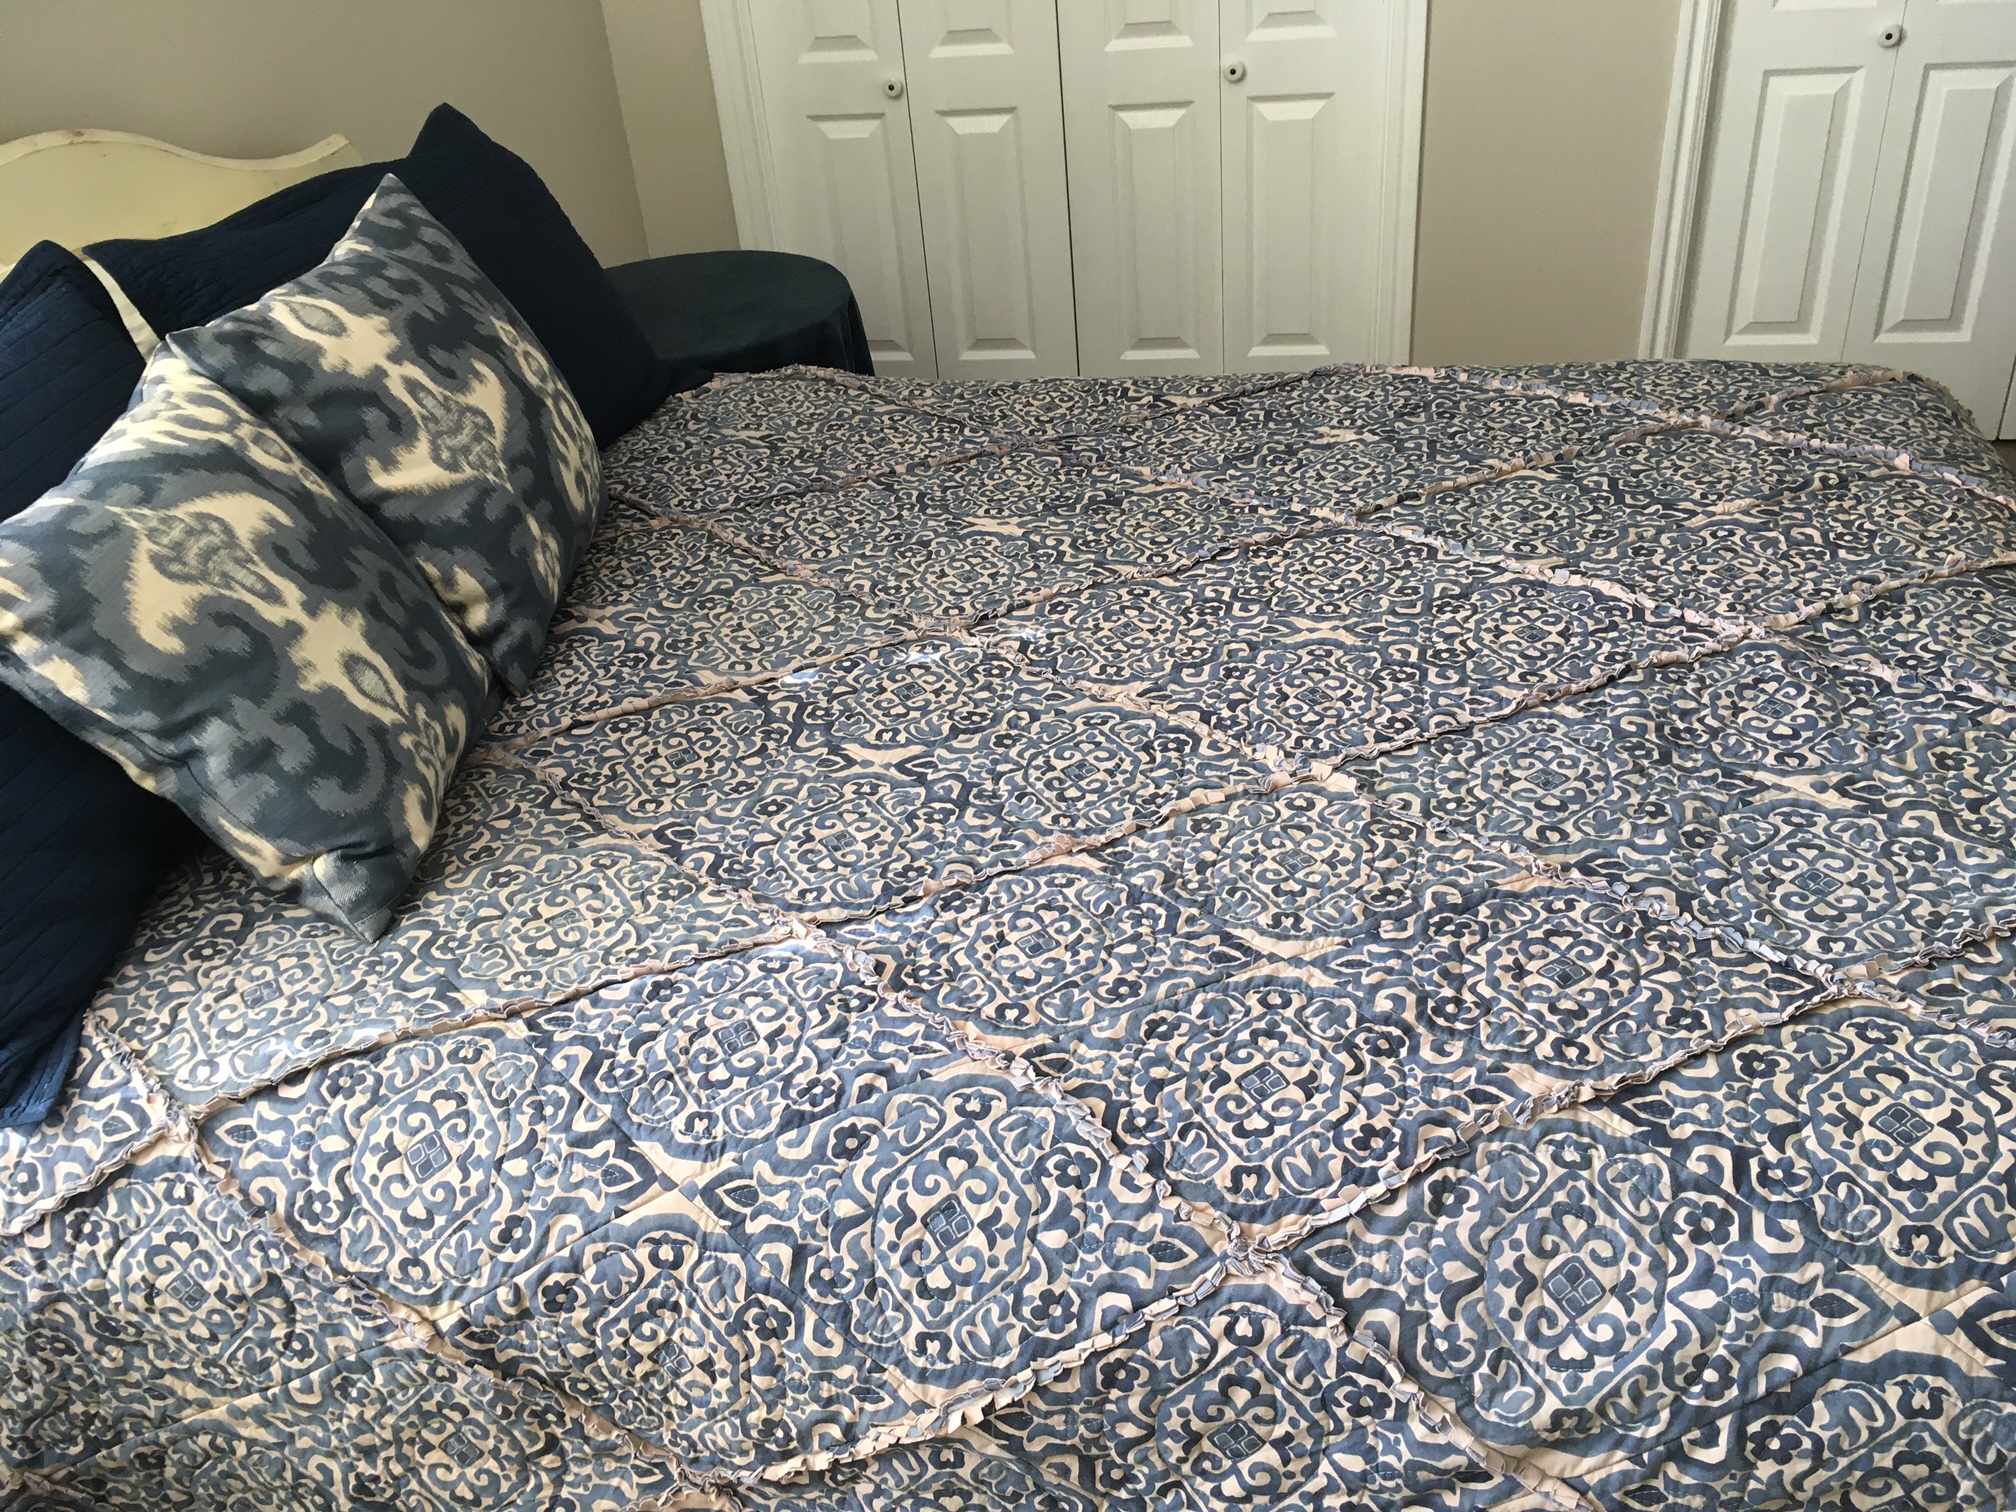


I found this duvet cover at a thrift store for $5! I loved the print (Pottery Barn Asher Medallion) but had too much white for my liking. I decided to make a quilt out of it and to dye it so the background would be off white. I used Rit Dye- Taupe and the sample piece turned out great, using 1 3/4 water and soaking for 3 min..
When I dyed the rest of the fabric, it looked pinkish. I dyed it again with taupe color hoping a little darker would get rid of the pink tone and it didn't help. I decided to try dying it blue on blue and used Rit dye Denim. It turned out gray!

At that point I actually had put it in the garbage. But, I loved the print so much I decided to get it out of the garbage and use it as a sample to see what it would look like as a rag quilt. I made a few sample rag quilt blocks and put them in the wash to curl up the fringe. By washing it again it faded much of the dye and was actually a decent color and I decided to move ahead with it. Tip- Always wash twice after dying to get a more accurate idea of the permanent color!

I also dyed the backing fabric which were 2 sheets from the thrift store. If you decide to take on a dye project, you may want to wear gloves. (My hands didn't stay blue for long.)

I had the opposite problem with the backing, it faded too much and I dyed it again and left it soaking for 1 hour and turned out great.

I rough cut quilt blocks layered with top, batting and backing to make it easier to handle cutting the diamond shapes.

I made a cutting template out of plexiglass from Home Depot and marked horizontal and vertical lines to match up the design before cutting quilt blocks.

Cut the quilt block in the desired shape. The quilt blocks will need to have 3 layers, backing, batting and top. Pin the stack together in several places. I chose a spiral pattern for the main quilt design. I used a circle piece of paper as the pattern and pin it in a couple of places. The quilting pattern should be 1-1.5 inches smaller than quilt block. This will allow for .5 seams and laying the seam flat when joining blocks.


I used this batting from Joann Craft.


Stitch around the edge of the circle pattern, stopping halfway and pivot to sew the spike design, repeating on other half. Once stitching is back at the beginning of the circle, unpin paper pattern and remove, while leaving block in position and continue sewing a spiral towards the center. Back tack at beginning and end. I used a walking foot since the block had edges cut on the bias. I have used a regular presser foot on another project with blocks cut on straight grain.

Trim all edges of the batting .5 inch. On a square block I have not trimmed this much batting and in fact I stitched the blocks together and then trimmed up to the seam. I decided to use this method (which is the rag quilt method) since the points are quite bulky with batting sewn in the joining seam.

Stitch blocks together placing right sides together, folding the backing on the bottom block down.

On the top block make a .5 inch snip, 1.5 inch from each end in just the backing layer facing you.

Stich blocks together folding down the ends from the snip and back tacking each end.


Hand stitch the backing, making sure the ends are not attached to the batting and are free to connect to another quilt block.

Repeat connecting blocks to desired length.


Connect rows of blocks in the same manner.

Continue adding blocks and rows to desired shape and size.

I really enjoy doing lap quilting.

I even like how the back turned out, kind of patch work with different shades of blue.