We have enjoyed our freeze dryer which allows us to preserve a larger variety of foods than home canning:
onions, green pepper, celery, salsa, marinara, tomato sauce, green peas, green beans,
brocoli, zuccini, strawberries, bananas, apples, watermelon and canteloupe.
chicken, beef, pizza, ice cream sandwiches, and rice and beans all of which reconstitues instantly or within about 10 min.
We tried using the mylar pouches that came with the freeze dryer, but didn't like them for long term storage because they didn't stack and if we put them in a bin, that seemed to take up more room. We have found that we like the 1 gallon buckets best.
We have color coded tags for the buckets to make it quicker to spot what you are looking for, just like we did for the 5 gallon buckets of grain and beans. Pink is for fruit, green is vegetable, red is meat, orange is beans and purple is rice.
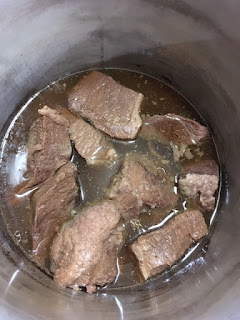
We have found that cooking chicken in the pressure cooker at 15 lbs pressure for 30 min makes it nice and tender and ready to shred for freeze drying.
Or cook in Teriyaki sauce for another option.
We are still experimenting with the time for pressure cooking beef. We have tried 30, 45 and 60 min at 15 lbs pressure and still not satisfied with the outcome for tender cooked beef. Some pieces are tender and maybe it depends on the cut of roast. If you have any suggestions, please leave a comment.
02/21/2021 THIS IS AN UPDATE TO THE FREEZE DRYING POST
These carrots were freeze dried raw in 2019 and 2020. As you can see they have faded and don't smell like carrots or taste like carrots. They are more like dehydrated carrots, which are not like carrots at all. These all had oxygen packets in the one gallon buckets. So I am assuming because they were not blanched, they have deteriorated.
These are from 2019 and look more like apples than carrots. I threw them all out and started over experimenting with blanching. I tried steam blanching by putting about 4 cups at a time in my steam juicer and going by the guildlines from the National Food Preservation Website stating 4 min steam blanch for carrots. I steamed them for 4 min and stirred them and then steamed them an additional 4 min. There were still some cold pieces. So I tried water blanching.
I brought the water to boiling, added 5 lbs of peeled, sliced carrots and let the water come back to boil and then I strained off the carrots, leaving them slightly firm. I used 20 lbs of carrots and filled a little more than the 5 trays. 4 trays filled 4.5 1-gallon buckets.
This is after freeze drying. As you can see, right now they look beautiful. They taste wonderful and rehydrate immediately. Hopefully in a year, we can say the same thing. I will update this next year with the findings.
2021 is the first year for trying freeze dried potatoes. I first tried a batch raw and much of the batch turned dark like the picture below.
This picture is actually from a batch I steam blanched using the same time table and method as the carrots, some pieces still cold. Then, I used water blanching for 1 minute and reconstitution took about 10-15 min. I settled for the same process as carrots, adding them to boiling water and once it reached boiling again, strained them off. This took approximately 8 min to boil again. The potatoes reconstituted instantly. I will update the status of the potatoes next year as well.
FOOD STORAGE IDEAS
Recapping post on food storage from Feb 2013
Five gallon buckets work well for long term grain and bean storage. Color coded tags help to identify what you are looking for more quickly. Buckets are labeled with a stick on label that includes the date it was packed as well in case the tag get pulled off.

Colored stickers can be added to the tag to identify a specific variety of grain or bean.
#10 cans are stored in the box on it's side with the flaps folded in so you can grab a can easily. Also, write the contents on the top with a permanent marker.

Lids are the weak link. After dropping a case of mayo and several jar lids breaking and splattering everywhere, we decided to move anything with a plastic lid or glass bottle to the floor where it wouldn't fall off the shelf. I changed containers with metal lids for as many dry goods as I could.

Make sure you use the tear tab lids. I drop tested a five gallon bucket of wheat from the top shelf. The regular lid didn't come all the way off, but it did open up a few inches and spilled some wheat. The tear tab lid held up to the drop test.
Large crates help to organize bottles and slide out for loading or unloading.
The second shelf has some plastic containers and metal lids have been used as much as possible to avoid breakage. The bulk baking items like baking soda, powder, tapioca, cocoa, etc are in quart plastic jars and metal lids with stick on labels.

Other baking items such as cake mixes, yeast, pudding, jello, organize nicely in sweater box bins.
We originally used shoe box size bins. Now that these are stacked, the bigger size makes it easier to pull out a bin.

Gamma lids are great for frequently used buckets.
So easy to open and close!


